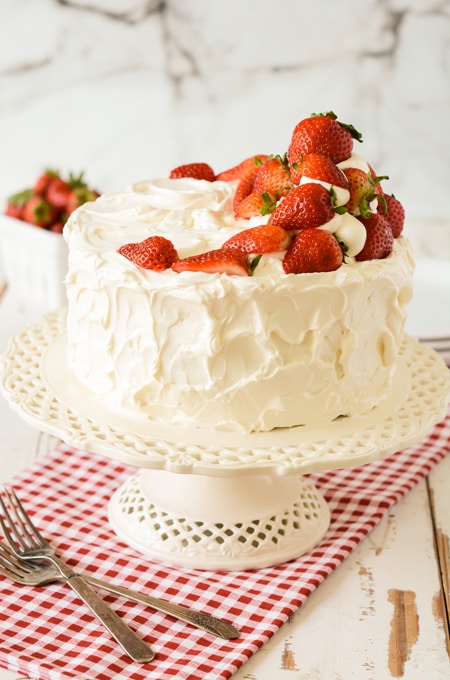
White Cake with Strawberry Filling
Disclosure: As an Amazon Associate and member of other affiliate programs, I earn from qualifying purchases.
If you’re looking for a white cake that is tall and light, then this recipe is for you! I had a mother and daughter ask me for advice on baking a white cake. The daughter tried many white cake recipes but they just kept coming out similar to angel food cake, spongy and full of holes.
Realizing I didn’t have a basic white cake recipe in my repertoire, I started doing some research. Scroll down to the next section to see what I found.

Reverse Creaming Method
After doing some searching, I found that using the reverse creaming method for white cake was ideal. Why? Because adding the butter to the dry ingredients coats the flour creating an ultratender crumb.
And instead of whipping the egg whites and folding them into the batter, which can leave your cake with holes, I simply combined the egg whites with the milk before adding to the butter-flour mixture.
Plan It Out
There is never a time I make a whole cake in one day. I typically make a complete cake over the course of 2 days or even 3 days if needed.
Day 1: Bake cake layers and filling. This filling can be made in advance so I went ahead and made that ahead of time for this cake.
Day 2: Make the buttercream and decorate. Swiss Meringue Buttercream can be a little temperamental so I make sure I do not rush this process. But, I’ve picked up a few tips over the years for silky smooth buttercream every time. (Keep scrolling for those tips.) Cake decorating is a whole other process outside of baking the cake. Another step I don’t like to rush.

Cake Storage
Continuing on from the last section, after I’ve made the cake layers and they have cooled to room temperature. I wrap each layer up tightly in a double layer of plastic wrap and store in an airtight cake container on the counter. You can keep them out on the counter at room temperature for about 3 days.
Alternately, you can freeze them for 1 month. After you’ve wrapped the cake layers in plastic wrap, wrap the layers up in a double layer of foil. Thaw cakes at room temperature overnight.
Filling can be made up to 2 days in advance, stored in the refrigerator or at room temperature.
Swiss Meringue Buttercream can be made up to 10 days in advance, stored in an airtight container in the refrigerator for up to 10 days, and can also be frozen for up to 2 months. Thaw frozen buttercream in the refrigerator and bring to room temperature before remixing.
Assembled cake can be stored in an airtight cake container in the refrigerator for up to 3 days, bring to room temperature before serving.

Buttercream Tips
I’ve had a bit of an obsession with Swiss Meringue Buttercream lately. When I first started baking I remember I could never get it to turn out right so for awhile there I just stopped trying. But, after a little while, when I had more experience in my apron :), I started trying again, and with a few helpful tips I was able to make Swiss Meringue Buttercream that always came out silky and smooth!
- Double check that your mixer bowl and whisk attachment are clean of grease. Grease will cause your egg whites not to whip up. Also, be sure your egg whites are free of egg yolk or the egg whites won’t whip up either.
- Whisk the egg whites and sugar together well before you start to cook them, otherwise the egg whites might start to cook on their own.
- Make sure your butter is at room temperature, maybe even a little warmer than room temperature, but not too warm. I always leave my butter out overnight and my buttercream always comes out smooth.

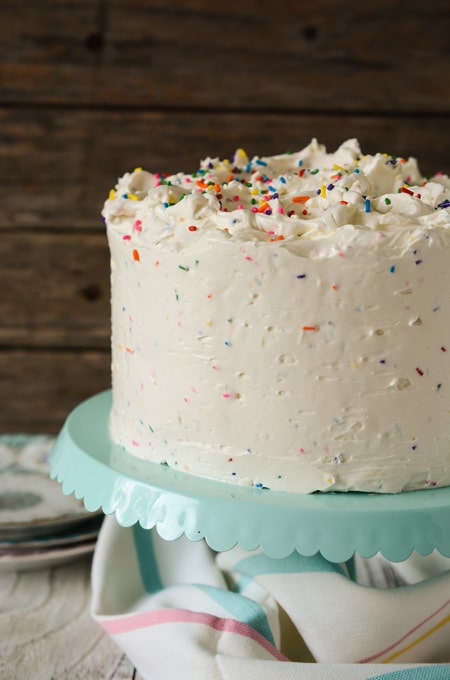
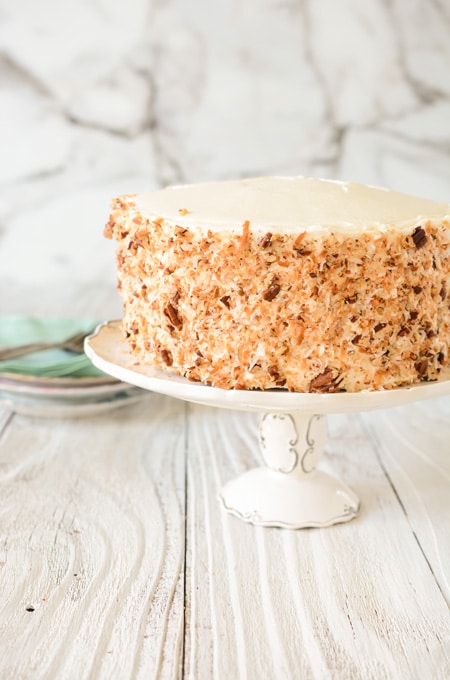
You May Also Like:
Confetti Cake with Buttercream Frosting
Italian Cream Cake
Old Fashioned Chocolate Cake

Adapted from The Perfect Cake by America’s Test Kitchen (cake), Cake Central by Melysa (filling), Layered by Tessa Huff (buttercream).

White Cake with Strawberry Filling
Homemade white layer cake with strawberry filling, frosted with a Swiss meringue buttercream frosting.
Ingredients
SPECIAL TOOLS
CAKE
- 1 cup whole milk, at room temperature
- 6 large egg whites, at room temperature
- 1 teaspoon vanilla extract
- 2 ¼ cups cake flour
- 1 ¾ cups granulated sugar
- 4 teaspoons baking powder
- 1 teaspoon salt
- 12 tablespoons unsalted butter, cut into tablespoon sized pieces, at room temperature
STRAWBERRY FILLING
- 12 ounces frozen strawberries, thawed
- ¼ granulated sugar
- 3 tablespoons cornstarch, mixed with 3 tablespoons cold water
- Fresh lemon juice, to taste
- 3 tablespoons Chambord, optional
BUTTERCREAM
- 1 cup egg whites
- 2 cups granulated sugar
- 3 cups (6 sticks) unsalted butter, cut into tablespoon sized pieces, at room temperature
- 1 tablespoon vanilla extract
- 1 pint fresh strawberries, optional, for garnish
Instructions
CAKE
- Adjust an oven rack to the center position and heat oven to 350 degrees. Spray 3 8-inch round cake pans with nonstick baking spray and set aside.
- In a bowl, whisk together milk, egg whites and vanilla extract. In the bowl of a stand mixer, with the paddle attachment attached, mix the flour, sugar, baking powder and salt on low speed until combined. Add butter one tablespoon at a time until the mixture forms pea-sized pieces, about 1 minute. Reserve ½ cup of the milk mixture and pour the remaining to the flour mixture and mix on medium-high speed until light and fluffy, about 1 minute. Reduce the mixer speed to medium-low and add the reserved ½ cup milk mixture to the batter and mix until combined, about 30 seconds. Do not over mix. The batter may look curdled. Give the batter a final stir by hand with a rubber spatula.
- Divide the batter evenly between the prepared cake pans and smooth tops with a rubber spatula. Gently tap cake pans on the counter to settle the batter and bake until a toothpick inserted in the centers comes out with a few moist crumbs attached, about 20 to 25 minutes, switching and rotating pans halfway through baking.
- Let cakes cook in their pans on wire racks for 10 minutes. Invert cakes on to wire racks to cool completely, about 2 hours.
STRAWBERRY FILLING
- Place thawed strawberries in a blender or food processor and puree until smooth. Over a bowl pour strawberry puree over a sieve to remove the solids. The puree will be thick. Use a spoon to stir and press the puree through the sieve.
- Place strawberry puree in a small saucepan over medium-low heat. Add sugar and cornstarch mixture and bring to a simmer, stirring constantly to keep lumps from forming. Once the puree thickens, remove from the heat. Cool for 5 minutes and then add fresh lemon juice and Chambord. Chill for about 2-3 hours in the refrigerator until ready to use.
BUTTERCREAM
- In the bowl of a stand mixer fitted with the whisk attachment, pour in the egg whites and sugar and whisk by hand until combined. Fill a medium saucepan with about 2 inches of water and bring to a simmer. Place mixer bowl on top, being sure the bottom of the bowl does not touch the water and attach a candy thermometer.
- Whisking occasionally, heat the egg mixture until the temperature reaches 160 degrees. Once the mixture reaches 160 degrees, transfer to a stand mixer and beat the mixture on high speed for 10 minutes or until medium-stiff peaks form. At this point the outside of the mixer bowl should be room temperature. Switch out the whisk attachment with the paddle attachment and with the mixer on low speed, add the butter one tablespoon at a time, and then add the vanilla extract. Once combined, turn up the mixer speed to medium-high and beat until the buttercream is smooth about 5 minutes.
ASSEMBLE
- Trim off any cake domes that may have formed during baking on each cake layer creating an even layer of cake. Fit a piping bag with a plain round tip or a coupler and fill with about 1 cup buttercream and set aside.
- Place a cake layer on a cake pedestal or serving platter and pipe a dam of buttercream around the edge of the cake. Spread half (about 1 cup) of the strawberry filling in the center of the cake layer, spreading it out until it reaches the buttercream dam. Add another cake layer on top and repeat this process with the buttercream dam and strawberry filling. Top with the last layer of cake (bottom side up) and cover the top and sides of the cake with the remaining buttercream. Decorate the top of the cake with fresh strawberries if desired.
Notes
Storage: Cake layers can be stored wrapped in plastic wrap in an airtight cake container at room temperature for 2 days.
Filling can be made 2 days in advanced and stored in an airtight container in the refrigerator or counter.
Buttercream can be made up to 10 days in advanced, stored in an airtight container in the refrigerator. Or can be frozen for up to 2 months. Bring to room temperature before remixing.
Recommended Products
As an Amazon Associate and member of other affiliate programs, I earn from qualifying purchases.


Nutrition Information:
Yield: 12 Serving Size: 1Amount Per Serving: Calories: 607 Total Fat: 19g Saturated Fat: 10g Trans Fat: 0g Unsaturated Fat: 7g Cholesterol: 53mg Sodium: 481mg Carbohydrates: 104g Net Carbohydrates: 0g Fiber: 2g Sugar: 76g Sugar Alcohols: 0g Protein: 8g
Did you make this recipe? I’d love to see it! Tag The Cake Chica on Instagram @thecakechica1 #thecakechica1
The post White Cake with Strawberry Filling appeared first on The Cake Chica.